Escort
Passport 9500ci
Installing
the 9500ci is somewhat more involved than hard-wiring the V1, as
there are several components (interface module, control module,
speaker, GPS antenna, front and rear LIDAR shifters, and the
RADAR antenna) which have to be fitted as seamlessly as possible
into the car. The installation of the 9500ci, while challenging
in any car, is even more so in the C6.
Front
LIDAR Shifters
The first
problem was mounting the front LIDAR shifter heads. A popular
location for mounting them is just inside the front grille
opening, suspended from the bottom of the front bumper cover.
The ZR4 shifters are relatively weak to begin with (as compared
to other LIDAR jammers such as the Laser Interceptor or
Blinder), and thus mounting them absolutely square and level is
essential to maximize their effectiveness. The problem is that
the underside of the front bumper of the C6 Corvette is not
level - the bumper has a slight (~2 degree) upward slope,
forming a barely-noticeable "V" shape:

2 degrees might not seem like much, but testing of the Escort
ZR4 shifters has shown that it's enough to compromise their
effectiveness.
So what to do? After much head-scratching and experimenting, I
tried some composite
shims and found that their slope was just about perfect:

Here are the shims attached to the ZR4 mounting brackets:

RADAR
Receiver
The next
problem was the RADAR receiver module. Like the LIDAR shifters,
the RADAR antenna needs a clear view of the road ahead. I also
wanted to make the installation as stealthy as possible, so
placing the antenna back inside the front grille opening seemed
like the obvious choice. However, there is a slight drop-off
just behind the grille that made this somewhat problematic. The
drop is easy to see in this view of the area behind the grille.

When placed on this "shelf," the front of the RADAR antenna is
almost completely blocked by the bumper cover:

I solved this problem by building a small platform out of
aluminum angle stock:

This platform raised the antenna up just enough to clear the
plastic pieces.

Once installed, the RADAR receiver is almost impossible to see.

You have to crawl on the ground and look very closely. It's
there in the center, just beneath the license plate:

The wiring was routed around the perimeter of the grille area
and held in place with anchored zip ties.

Once inside the engine compartment, I enclosed the wiring with
plastic wire loom and routed it near the factory wiring
harnesses back towards the firewall, taking great care to avoid
moving parts like the hood support struts and areas that are
likely to get hot like exhaust manifolds.

I drilled a small hole through the firewall just behind the
battery shelf for the wires to enter the cockpit:

After running the wire under the battery tray and through the
hole, the supplied grommet neatly sealed the hole.

I then completed the wire loom installation.

Once encased in the wire loom, the new wiring is virtually
indistinguishable from the factory wiring harnesses.

Rear
LIDAR Shifter
Mounting
the rear shifter was comparatively straightforward. It mounts
just above the license plate using the same two screws that hold
the license plate.

There
is a convenient opening just above the license plate where the
wire can enter the empty space behind the rear bumper cover. To bring the
wire inside the car, I drilled another hole just behind the
right taillight.

As before, the Escort-supplied grommet was used to seal the
hole.

Here is the view from inside the rear hatch area:

GPS
Receiver
With the
hatch area trim pieces removed, I also installed the GPS
receiver on top of the driver's side rear wheel well, attached
with double-sided tape:

Although there is a plastic body panel above it, GPS reception
is not significantly impaired, and I never have a problem
getting a signal lock.
Working my way forward, I removed the interior trim pieces along
the passenger side and routed the shifter and GPS wires forward
to the passenger side footwell area. In the process, I somehow
managed to destroy and/or lose a couple of the little plastic
pins that hold the trim pieces on; fortunately, a quick trip to
the local Pep Boys resulted in suitable (though expensive)
replacements.
Speaker
The
9500ci's speaker was mounted above the passenger side "hush
panel." Fortunately, it doesn't hush the sound from the speaker
very much, and the warnings are still clearly audible anywhere
inside the cockpit.
Control
Module
My current
plan is to mount the 9500ci's control module behind the ashtray
panel, similar to this install in an Audi R8:

With the auxiliary mute button installed within easy reach in my
center console, there's no need to access the control module on
a regular basis; thus, it can remain hidden away behind the
ashtray panel when not in actual use. However, because of the
fabrication skills required to do this well and have it look
good, I haven't gotten around to this part of the install as of
this writing.
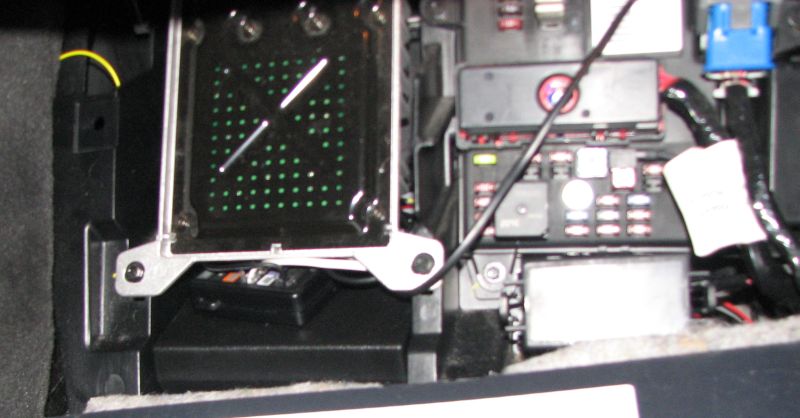
Interface
Module
Tying it
all together, the 9500ci interface module is installed behind
the passenger side footwell panel in the space beneath the Bose
amplifier. All of the wiring discussed thus far converges in
this area, which also contains the fuse panel.
Display
Module
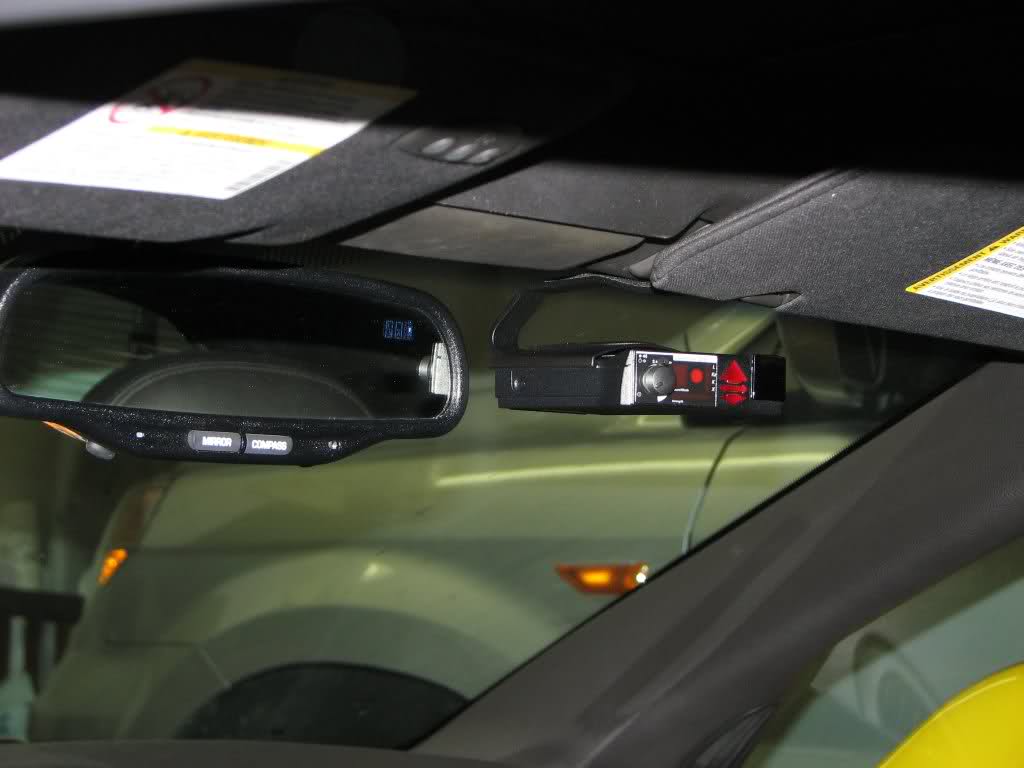
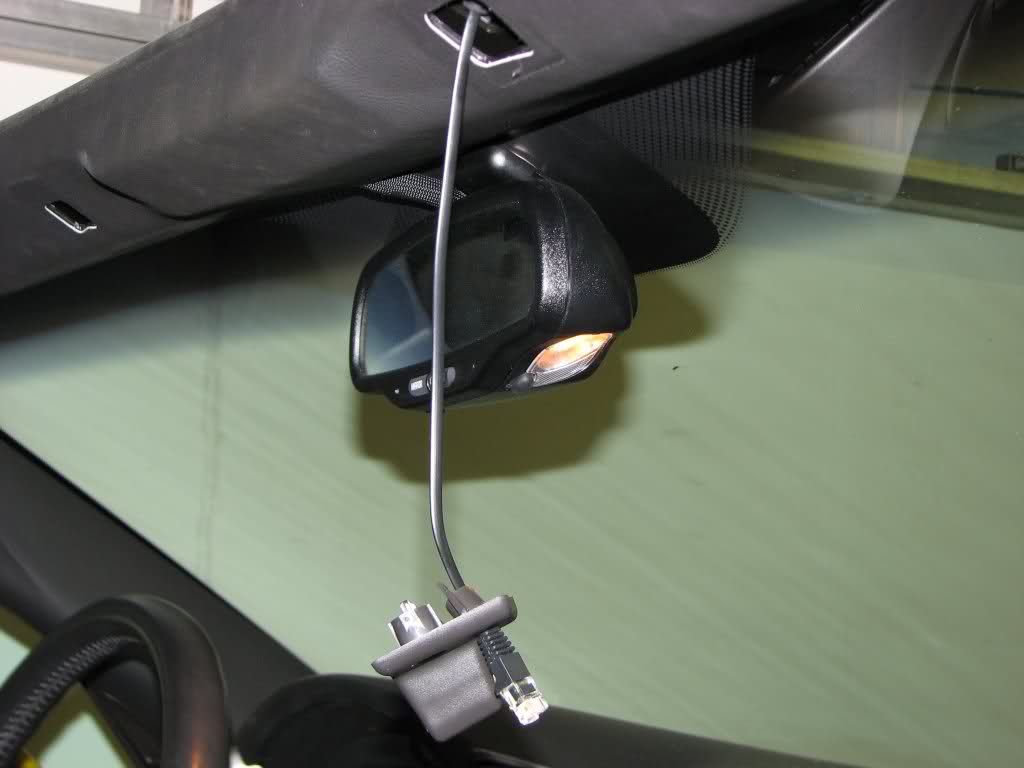
Because the
display from both RADAR detectors is projected on my windshield
by the C6 HUD, I didn't install the 9500ci Display Module. While
it should be possible to install both the Display Module and the
HUD One simultaneously through the use of a splitter, the HUD
One's display is so superior I never felt the need.
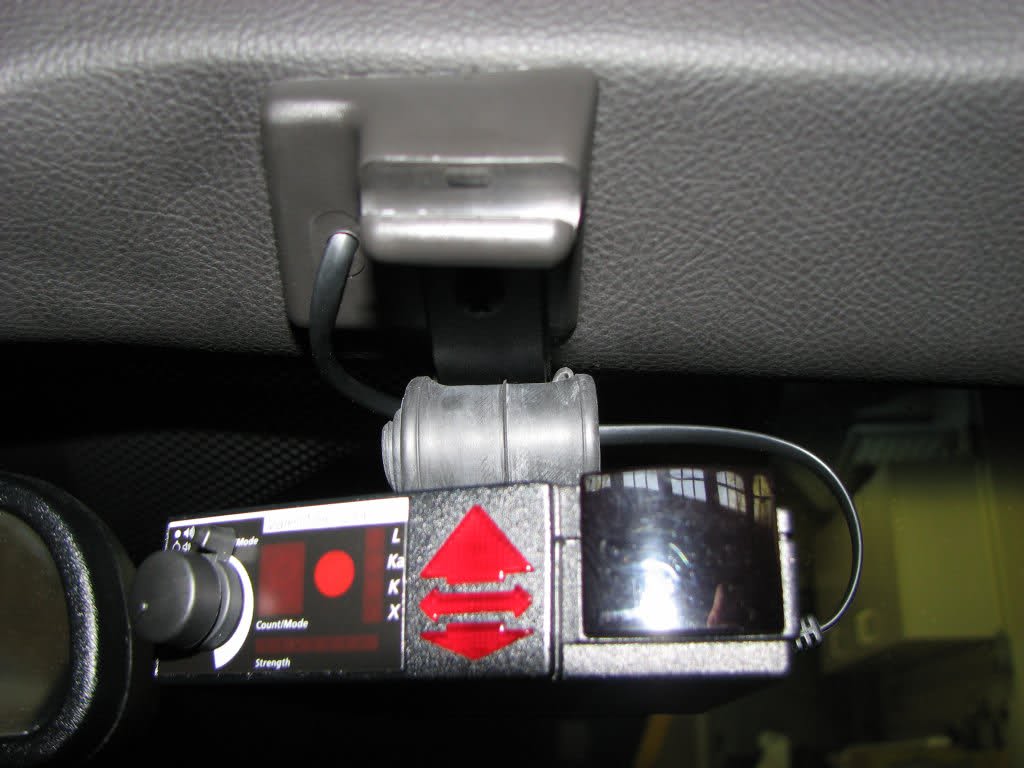
HUD One
The HUD One
main board fits into a Serpac
051 or 151 enclosure. This
enclosure was chosen specifically to fit into the cozy little
spot underneath the passenger side floorboard, next to the fuse
panel and the amp for the stereo. There is just barely enough
room in this space for both the 9500ci Interface Module and the
HUD One.
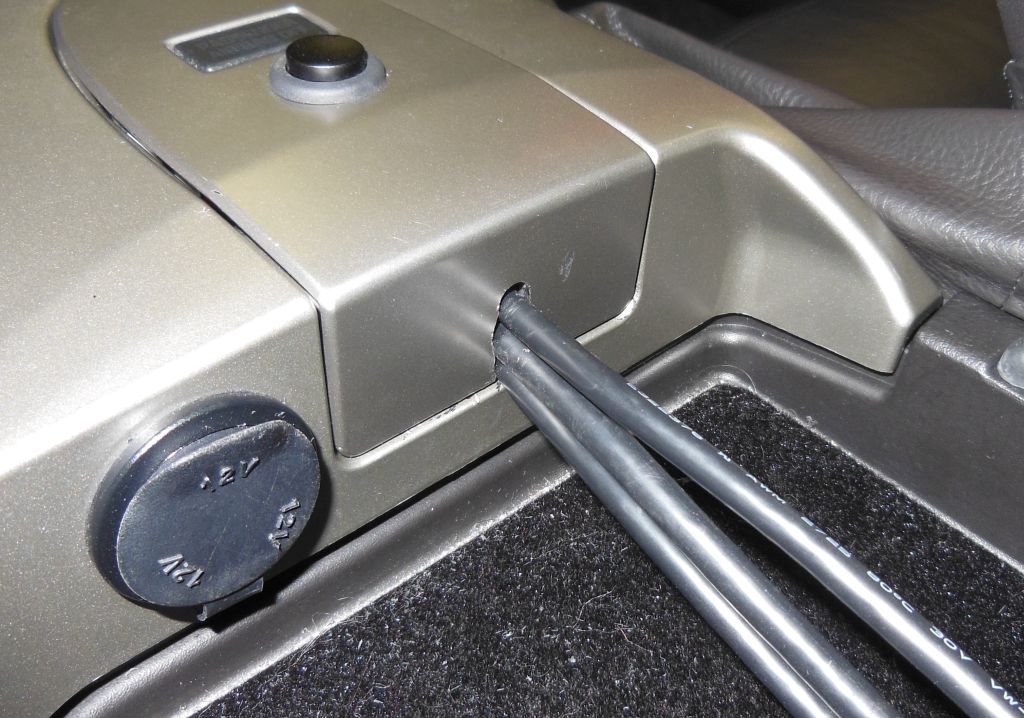
Mute Button
I installed the
HUD One's mute button in the "tombstone" panel in my center
console. If a LEO hits you with a burst of
instant-on RADAR or a LIDAR gun and sees you immediately reach
up to your headliner to press the mute button, it's a dead
giveaway that you have a RADAR detector in your car. Mounting the
mute button here puts it within easy reach when needed, and it
can be pressed without any moves that are visible from outside
the car. Both the mute button on the V1 and on the 9500ci
Control Module remain fully functional as well. The three
large cables coming out of the front of the tombstone are the USB
and HDMI cables for my
AVIC-8000NEX
installation.