The CD drive in my factory navigation unit died a while back.
While I could have replaced it with another stock nav unit, I
decided to take the opportunity to upgrade and gain some new
capabilities, such as Bluetooth hands-free and iPod integration. I
wanted the process to be as plug-and-play as possible, with no
permanent modifications to the car or its wiring. Fortunately (or
perhaps unfortunately) there are many excellent choices for the C6
Corvette. While prowling the Internet looking for options, I
stumbled across this video:

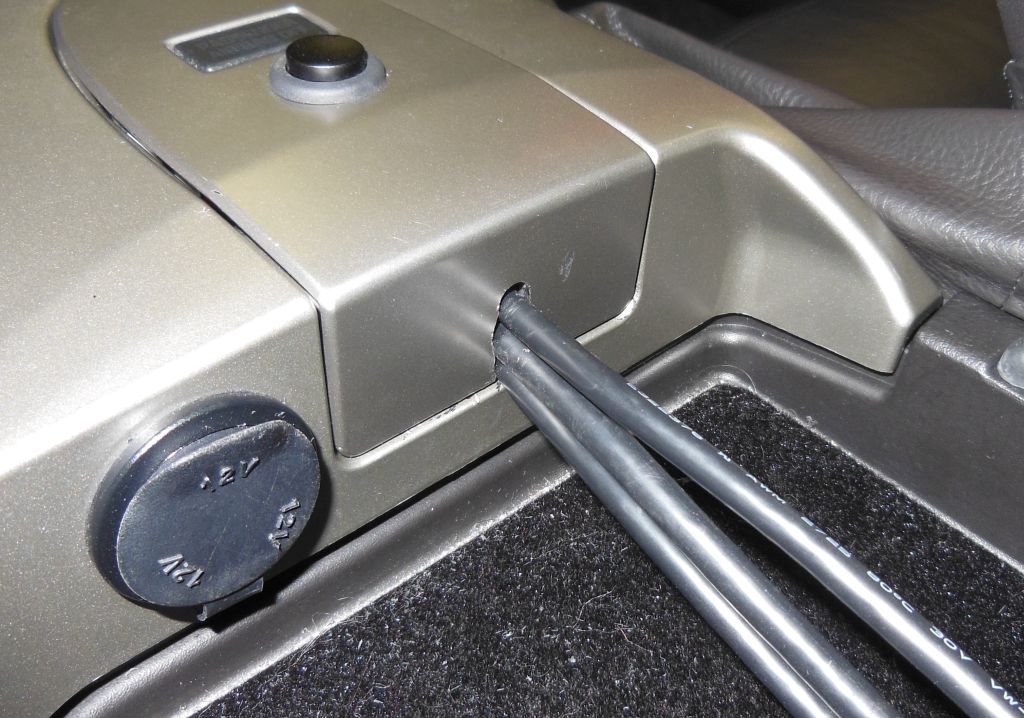
The reverse gear wire was well-hidden in a large wiring bundle.
After carefully slicing open the plastic wrapping, it took some
digging to even see it, let alone bring it out front to where it
could be tapped. (The add-a-circuit lead to the left of the
squeeze tap powers my
RADAR detectors and
HUD One).

I mounted the new Bluetooth microphone on the
headliner next to the (now unused) stock mic. From all reports,
this position works well. I have yet to test it with road or
wind noise, however, so I left myself the option of moving the
mic to the rear view mirror area should that become necessary.
Pending further testing the mic is simply clipped into the
headliner as discussed in
this video.
Another option, should I ever get to feeling ambitious, would be
to
upgrade the
factory mic and then connect it to the AVIC-8000NEX using
some sort of adapter plug on the factory wiring.

I ran the wiring for the mic across the
headliner and down the passenger side A pillar, alongside the
wiring for my
Valentine One.
It's virtually indistinguishable from the factory wiring.

Now the really
fun part began. The AVIC-8000NEX has 2 USB ports and one HDMI
port which are used to connect devices like iPods and cellular
phones so that they can be controlled by the head unit. For
maximum flexibility, all 3 of these ports need to be brought out
to some convenient place in the car. Unfortunately there aren't
many such places in a C6. The logical choice is the center
console area inside the armrest. However, getting these three
cables out to that area took some doing. After considering many
options, I decided to route the cables through the "tombstone"
plate.
The first step was to drill a hole in the support piece large
enough for the USB and HDMI plugs to pass through. This was
easily accomplished using a step drill bit.

The console shell needed a similarly-sized hole.
Unfortunately due to the shape it was not possible to use the
step bit. So I used a
Dremel
tool to gouge out the necessary hole.
WARNING!
Graphic images ahead!!
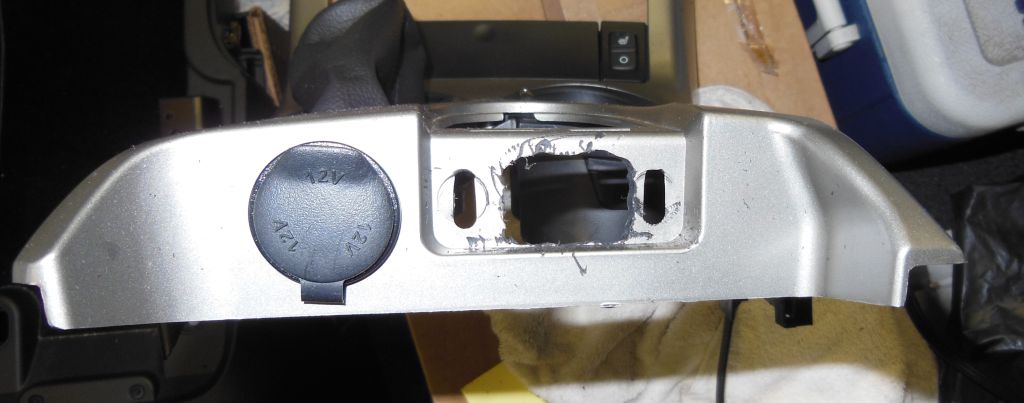
I know,
I suck at the Dremel. Fortunately
most of that horrible butchery will be hidden by the tombstone
plate. I bundled the USB and HDMI cables together using spiral
wrap and ran them out through the new holes.
Again using the Dremel I cut a slot into the side of the
tombstone plate to allow the 3 cables to pass through. (The
black button on top is the
remote
mute button for my RADAR detectors). With the plate
clipped into place it doesn't look nearly as bad.
The 36" cables I used are a tad
long; 30" cables would be about right (assuming I can find
some).

AppRadio mode on the 8000NEX requires yet
another adapter to break out the MHL connector on the phone into
separate USB and HDMI connectors for the head unit. When it's
all connected this rat's nest is the result. At least none of it
is visible once the armrest is closed.

The installation is now complete, at least from a functional
perspective. I'm not yet satisfied with the aesthetics of the USB
and HDMI connections; ideally I would have some sort of custom
dock which fits neatly into the armrest cavity and into which my
phone and iPod would neatly slip (and which would hide the rat's
nest underneath). But that's a whole 'nother project...


